
Test your old seeds before planting
Before you dive into your stash of old seeds and scatter them haphazardly in your garden, take a moment for a simple test that could save you from disappointment. This quick check will help you determine whether those aged seeds deserve a second chance.
Why Test your old seeds?
An old seed packet doesn’t automatically mean the seeds are dead. However, they may have lost much of their vitality over time. If you plant without testing, you risk wasting time and potentially losing an entire row of crops. Conducting a germination test provides you with a quick and reliable answer, allowing you to see immediately whether your seeds have sufficient germination rates. This is especially crucial for rare or expensive seeds, as it prevents unnecessary expenditures.
A simple at-home testing method
Materials Needed:
- 10 seeds of each variety you wish to test, if possible
- A plate or saucer
- 2 sheets of absorbent paper for each test
- A spray bottle or mister
- Ambient temperature between 68°F and 77°F (20-25°C)
Steps for the Test:
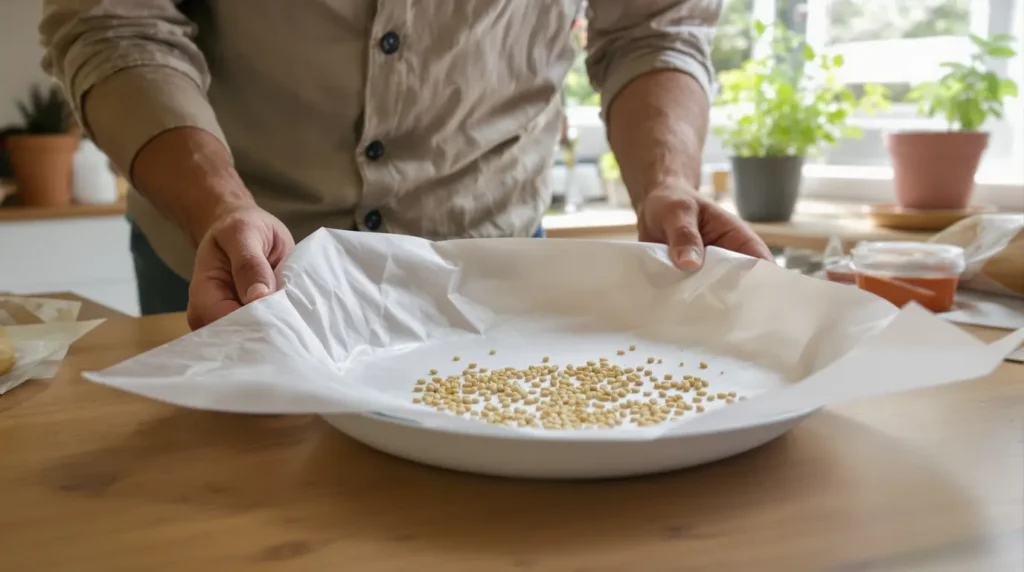
- Place one sheet of absorbent paper on the plate. Space the 10 seeds evenly on top, then cover them with the second sheet.
- Lightly mist the paper with water, ensuring it is damp but not soaked.
- Set the plate in a stable temperature environment, such as a kitchen away from windows or a warm interior windowsill.
- If you have a fresh packet of the same species, test it alongside the old seeds for a helpful reference point that can expedite result interpretation.
- Check your seeds daily for signs of the little white radicle (root) emerging. Depending on the species, germination may start within 2 to 4 days for certain vegetables. If you see mold before germination occurs, the test is compromised.
Interpreting the results: what do the percentages mean?
At the end of the test period, count how many seeds have germinated and calculate the percentage based on your initial 10 seeds. Here’s a straightforward guideline to remember:
- 80% and above: Plant as usual.
- 50% to 80%: Increase the planting density or tighten your rows.
- Below 50%: It’s best to purchase new seeds.
This simple benchmark can save you from a wasted growing season. Sometimes, simply planting more densely can compensate for average seed viability.
How long do seeds remain viable?
The lifespan of seeds varies by species and storage conditions. Here are general guidelines for seeds kept dry, cool, and out of light:
- 1 to 2 years: onion, parsley, parsnip
- 2 to 3 years: carrot, spinach, leek, sweet corn
- 3 to 4 years: bean, pea, bell pepper, chili, fennel
- 4 to 5 years: lettuce, tomato, eggplant, beet, mâche
- 5 to 7 years: cucumber, squash, melon, celery
These durations are approximate. A seed stored under ideal conditions may last longer, whereas a packet left in a warm room can quickly lose its vigor.
Storage tips to extend seed life
Proper storage is key. Keep your seeds in a dry, cool, and dark place. A sealed glass jar works exceptionally well. If you have one, consider adding a small desiccant packet to absorb moisture. Label each package with the purchase or harvest date to avoid mix-ups and surprises.
Avoid places with fluctuating temperatures. Windowsills, kitchens near the oven, or garages are not ideal. Seeds prefer stability.
What to do with questionable seed packets
Don’t toss anything without testing first. Conduct the absorbent paper test before making any decisions. In a matter of days, you’ll have your answer.
If the results are mediocre, plant more densely and monitor the emergence. However, if germination is very low, it’s time to invest in new seeds. This prevents a lengthy wait for a disappointing harvest.
This quick test takes just five minutes and provides invaluable information. Before you prepare your rows, water, or daydream about the harvest, check your seeds. You’ll plant with more confidence, and your garden will thank you.